Intellij
log4j
By default, the logger configuration is stored at root/src/main/resources/log4j.properties. Below is an example configuration for the logger
log4j.rootLogger=INFO, console

log4j.appender.console=org.apache.log4j.ConsoleAppender
log4j.appender.console.layout=org.apache.log4j.PatternLayout
log4j.appender.console.layout.ConversionPattern=%d{HH:mm:ss,SSS} %-5p %-60c %x - %m%n
Documentation
Update
- download from Download IntelliJ IDEA
- decompress using
tar -xzf ideaIC-2017.1-no-jdk.tar.gz
overwrite contents of INTELLIJPATH with extracted files ``
mkdir intellij-backup
mv $INTELLIJPATH/* intellij-backup
mv idea-IC-171.3780.107/* $INTELLIJPATH
- if successful:
rm -r intellij-backup
Configure Scala SDK
IntelliJ IDEA Tutorial
copied from coursera course “scala-spark-big-data”
1. Download IntelliJ IDEA Community Edition
IntelliJ IDEA Community Edition is an open-source version of IntelliJ IDEA, a premier IDE for Java, Scala and other JVM-based programming languages. You can download it from the official website.
2. Install the Scala plugin
Before you create or open a Scala project, you need to install the Scala plugin. For that, use the Configure → Plugins → Browse JetBrains Plugins from the Welcome Screen, or Preferences (Settings) → Plugins.
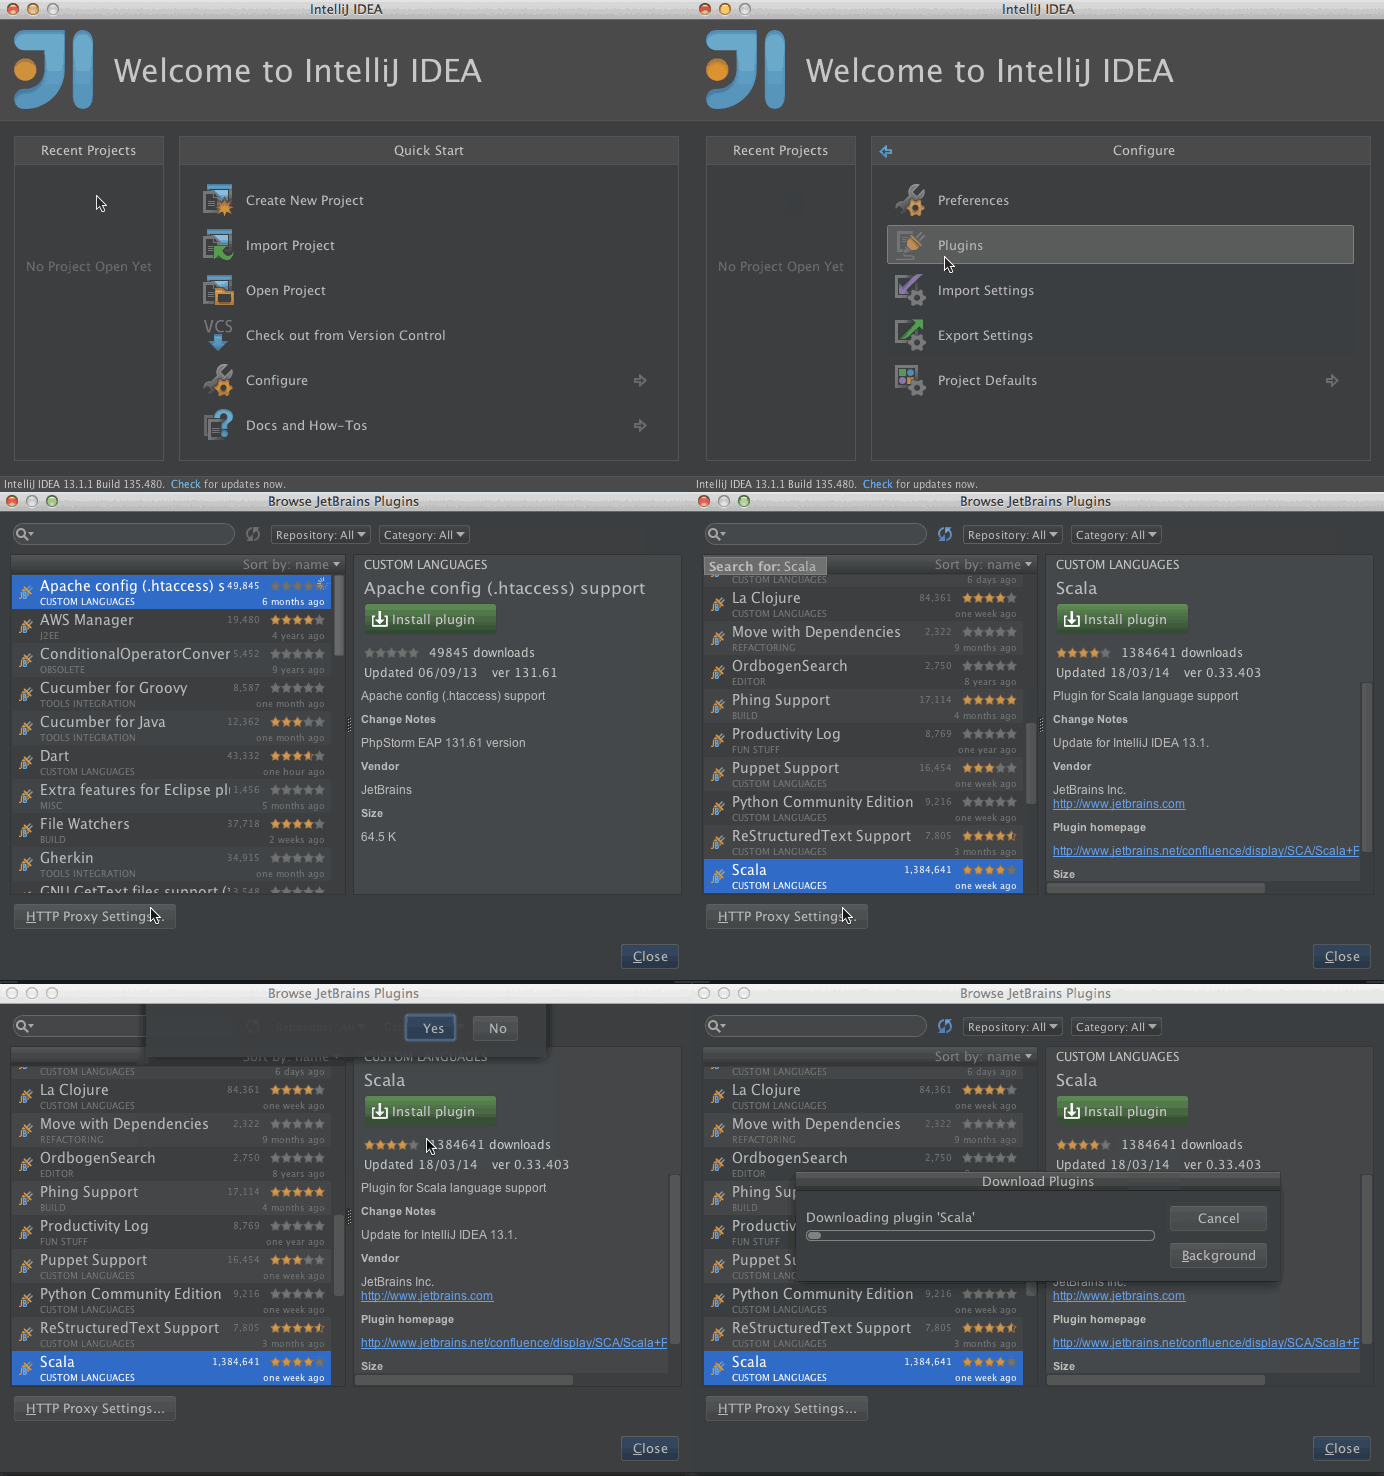
Note that Scala plugin requires restart to complete installation.
3. Setup the JDK
From the welcome screen, go to Configure → Project defaults → Project structure and add the JDK.
4. Creating a project
The easiest way to create a project is to use the Project Wizard. To use it, Click Create New Project on the Welcome Screen, then select Scala, and finally SBT Project.
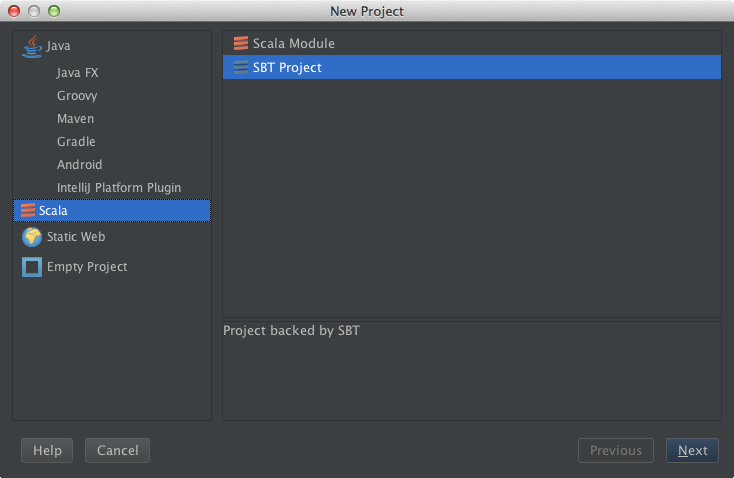
Click Next to specify project name and location. Once you’ve entered this information, IntelliJ IDEA will create an empty project containing a build.sbt file.
5. Creating a Scala worksheet
Simply use the Create New action from context menu or press Ctrl+N on a Scala source root.
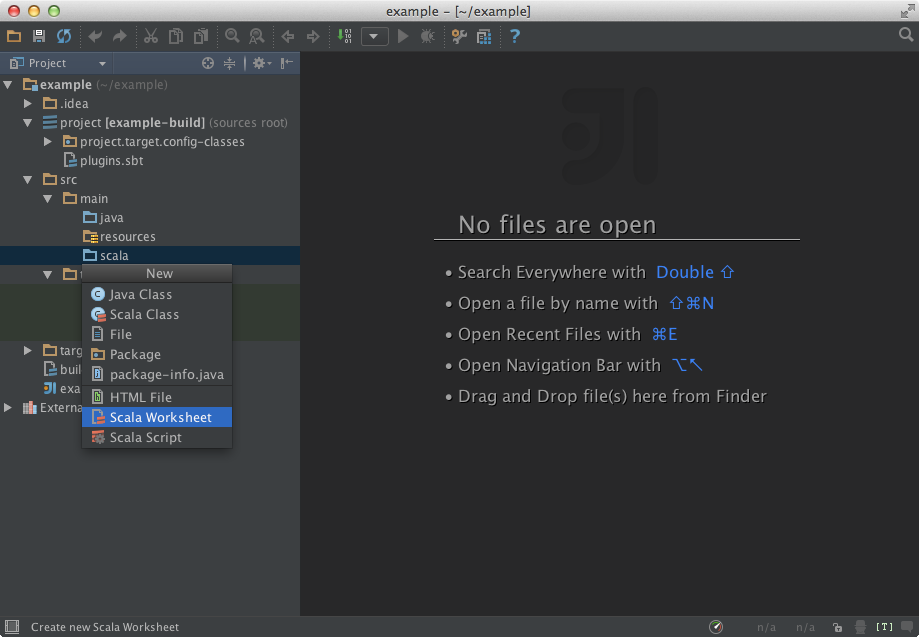
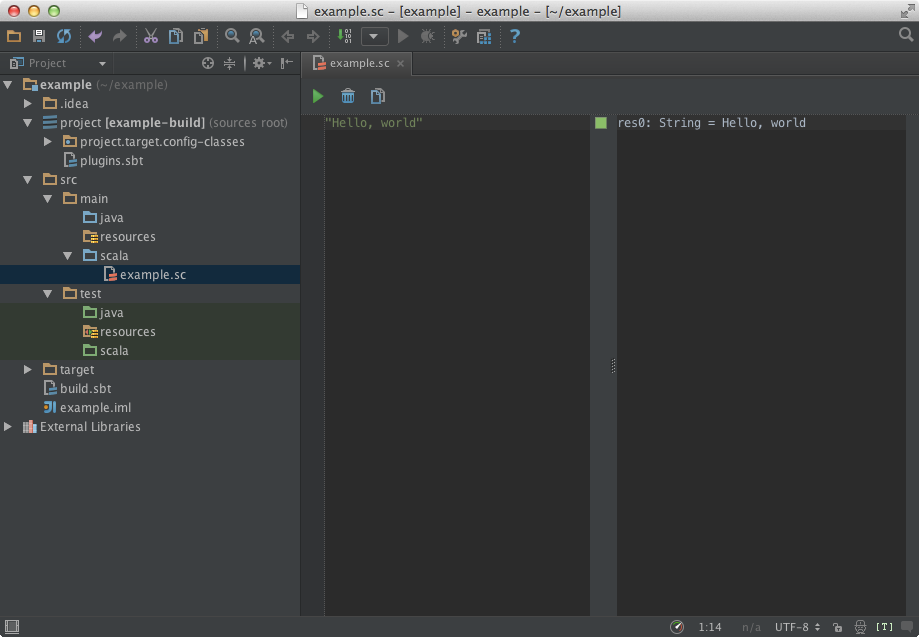
To evaluate worksheets, use the corresponding toolbar icon, or press Alt+Ctrl+W (Alt+Cmd+W on OS X)
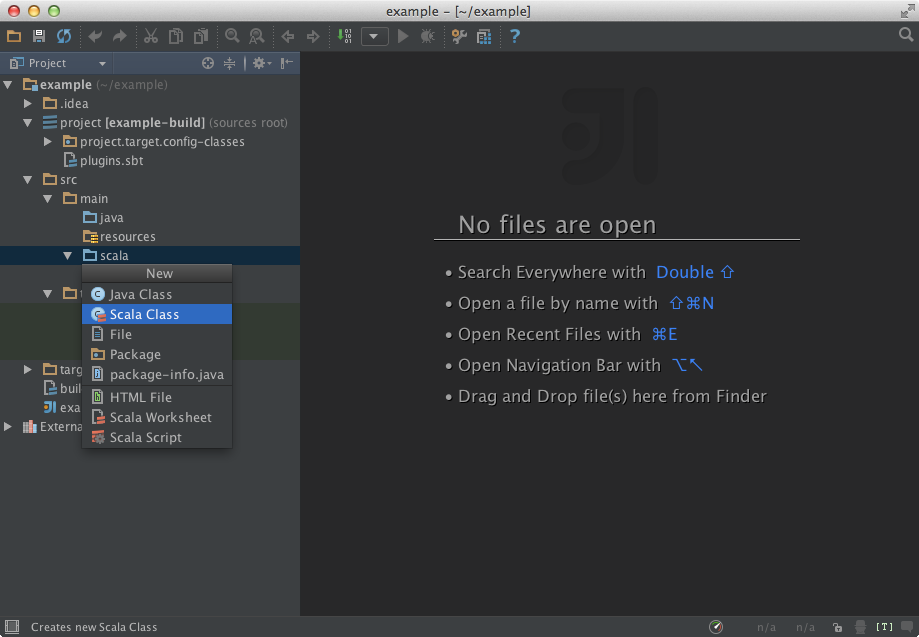
6. Creating a Scala class
Much akin to worksheets, Scala classes are created via context menu action Create New, or by using the Ctrl+N shortcut..
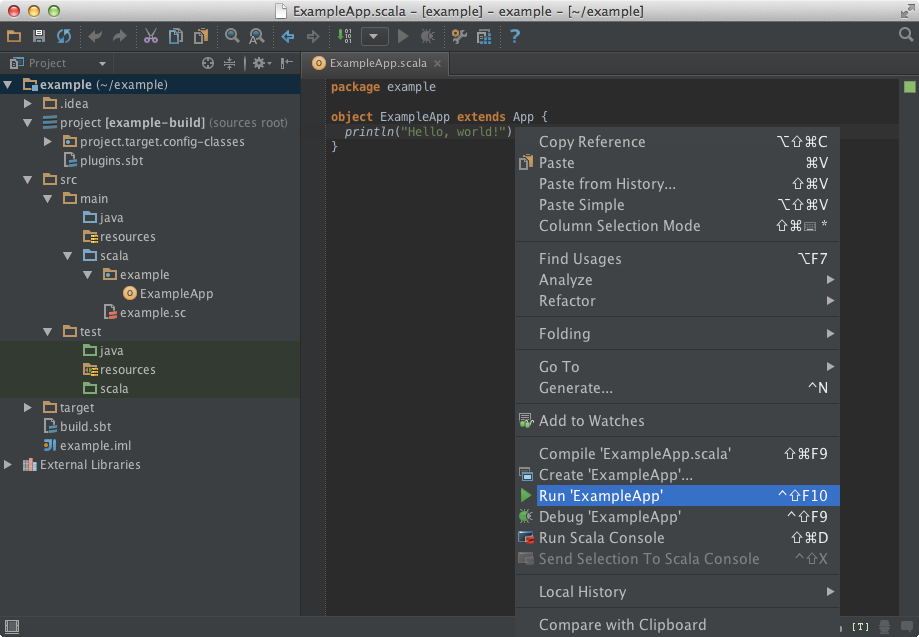
Once you are ready, run your application by pressing Ctrl+Shift+F10, or using the editor context menu.
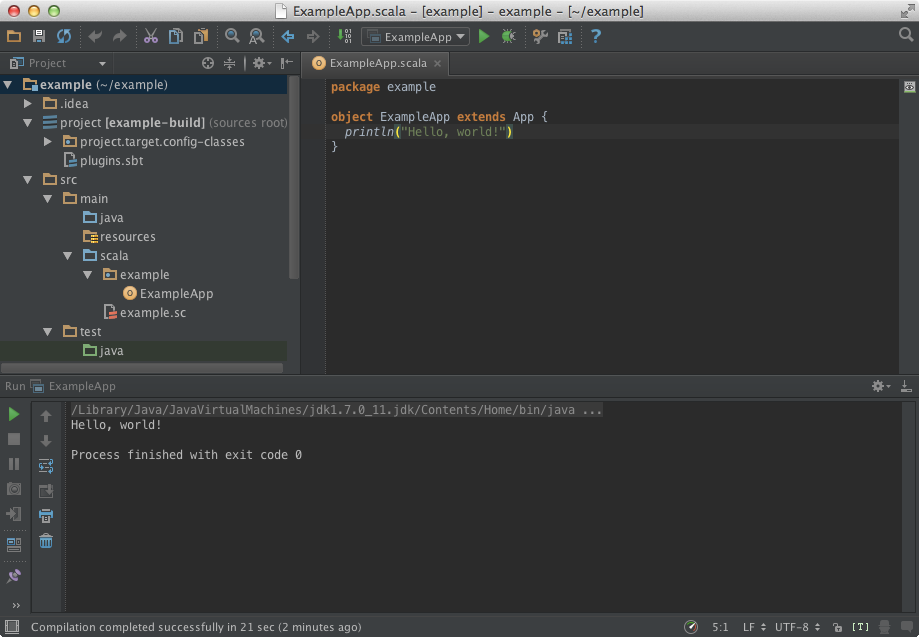
After the application has finished running, you’ll see its output in the Run tool window.
7. Opening an SBT project
To open an SBT project in IntelliJ IDEA, go to the Welcome Screen, click Import Project, and select SBT build file that you wish to open. IntelliJ IDEA will then create a new project and import the selected file to it.
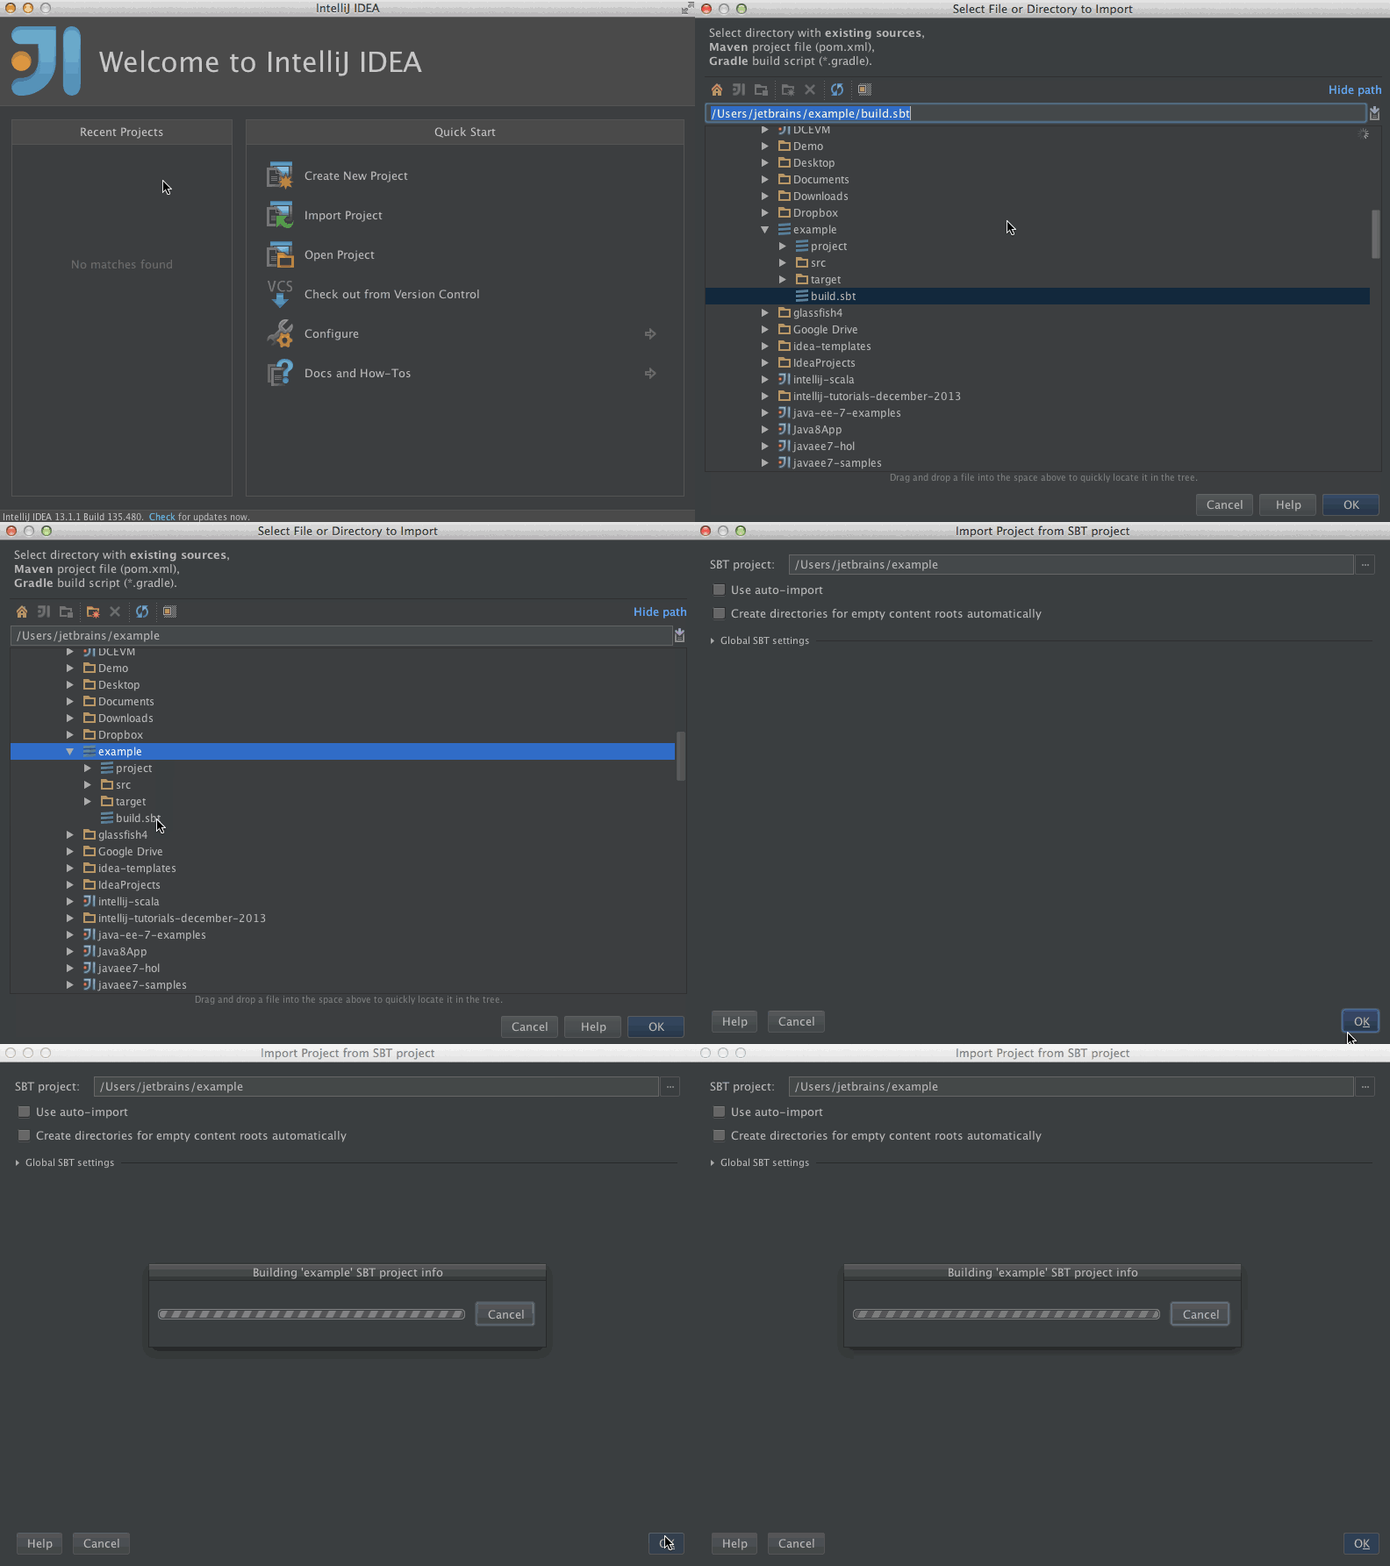
Also, you can open an SBT project without calling the Import Project action. Just click Open Project from the Welcome Screen and select an SBT build file.
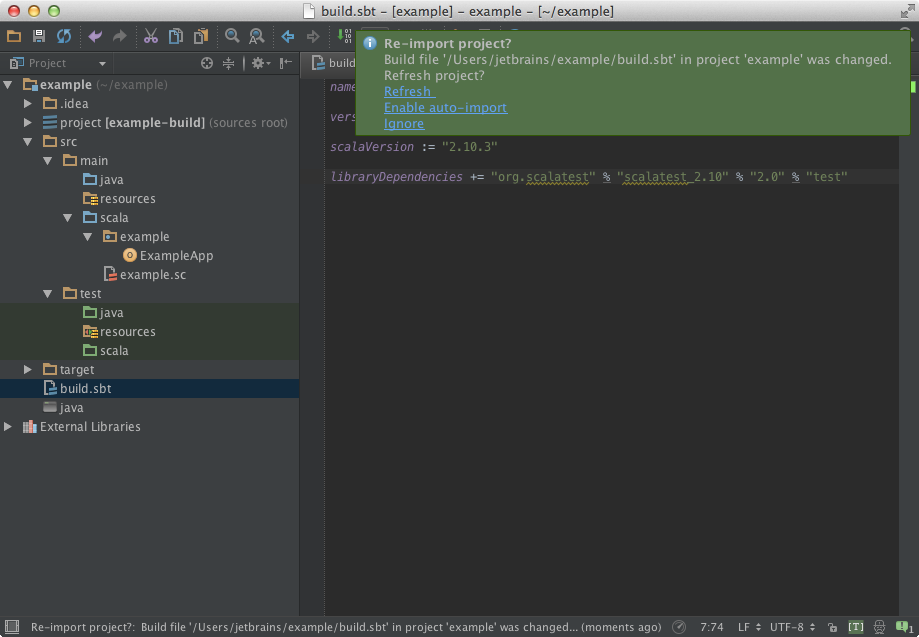
8. Synchronizing SBT and IntelliJ IDEA projects
IntelliJ IDEA SBT support synchronizes the project with your build file, so when you change Scala version you’re going to use, or add a library, your project is updated accordingly. For the next time, you can avoid this step by checking off the option ‘‘Use auto-import” in Step 7.
Warning: the scala version shown in this screenshot is 2.10.3 and it’s outdated. The scala version that we will use for this course is 2.11.x. Also, note that the scalatest dependency has the scala version embedded in “scalatest_2.10” and that there’s no 2.0 version for 2.11.x. So, replace:
libraryDependencies += "org.scalatest" % "scalatest_2.10" % "2.0" % "test"
by:
libraryDependencies += "org.scalatest" %% "scalatest" % "2.2.6" % "test"
The double percentage symbol will force sbt to use the current scala version defined in scalaVersion (which has to be “2.11.7” or “2.11.8”).
9. Using terminal to run SBT commands
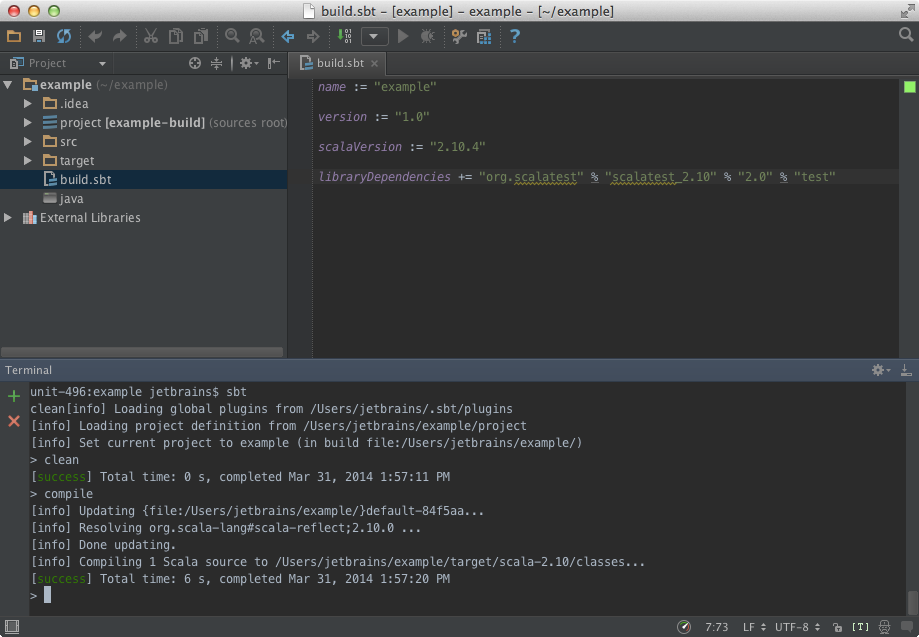
The easiest way to run SBT commands from from IntelliJ IDEA is to use the Terminal tool window via Alt+F12.
10. See also
To learn more about IntelliJ IDEA, read the IntelliJ IDEA quick start guide and Scala tutorials.